SUNY New Paltz has a nationally-recognized metalworking program in the fine arts department. I completed this course at a graduate level as an elective for my graduate degree. The coursework was completed under Prof. Joseph Pilari — a great teacher and artist!
I produced three distinct projects in this class:
- Brooch – “THE Starter Project for all metal students”
- Figure – “Skin and Skeleton”
- Mask – “Line on body”
In each of these projects, I sought to use digital tools and techniques in novel ways.
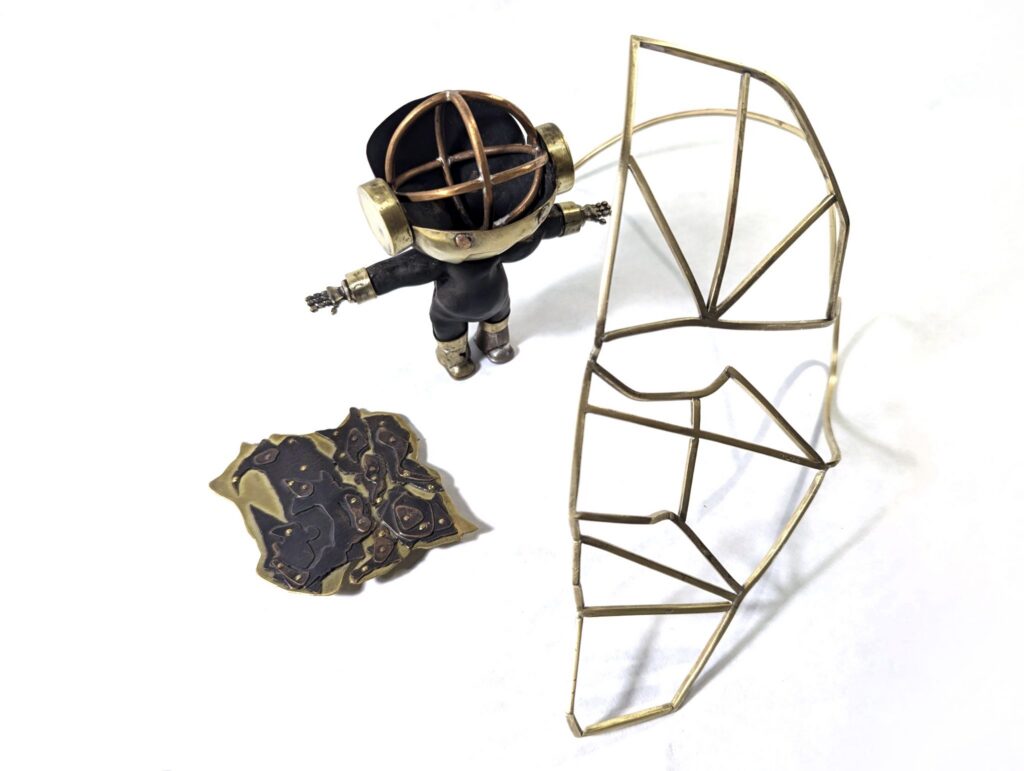
Brooch
Prompt:
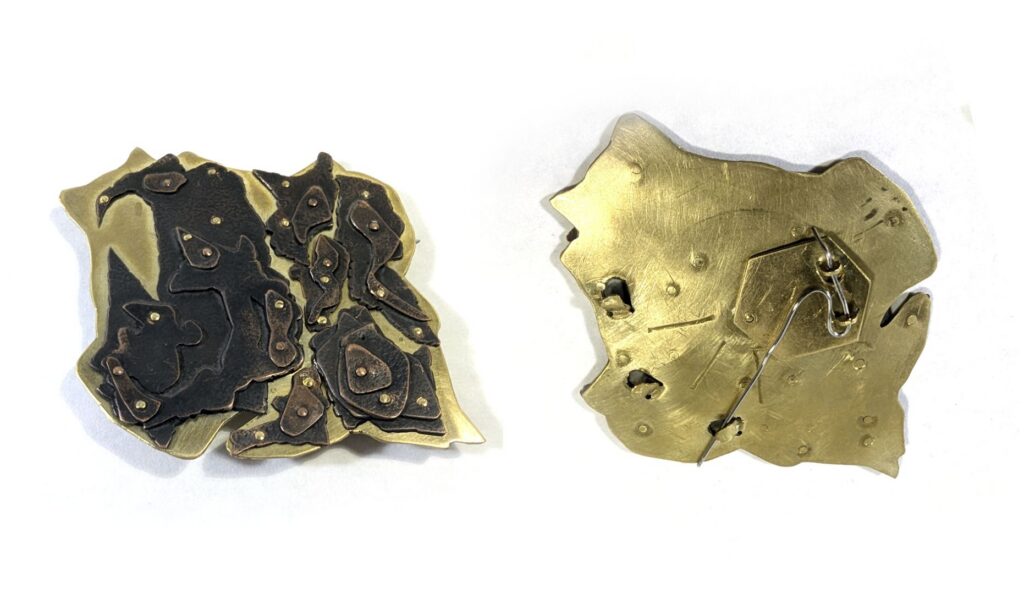
Make a brooch using cold connections (ie rivets) and piercing. Should reflect something about your identity.
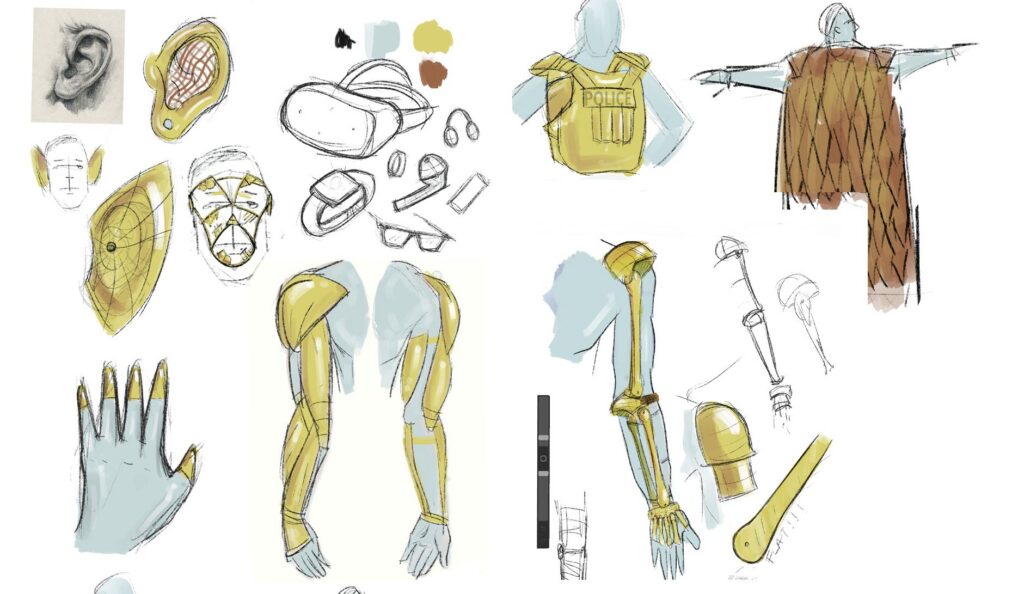
Concept
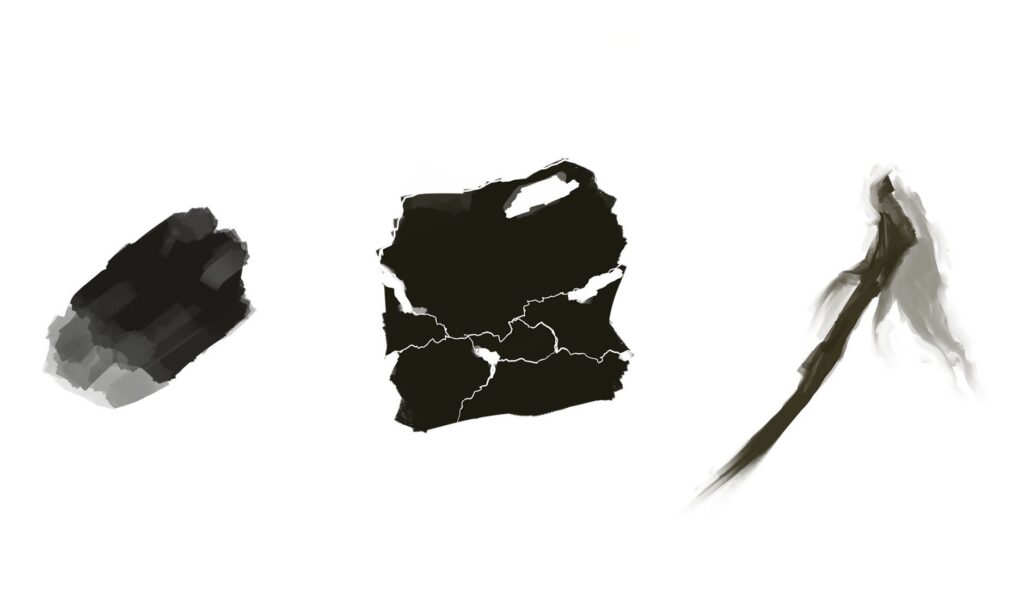
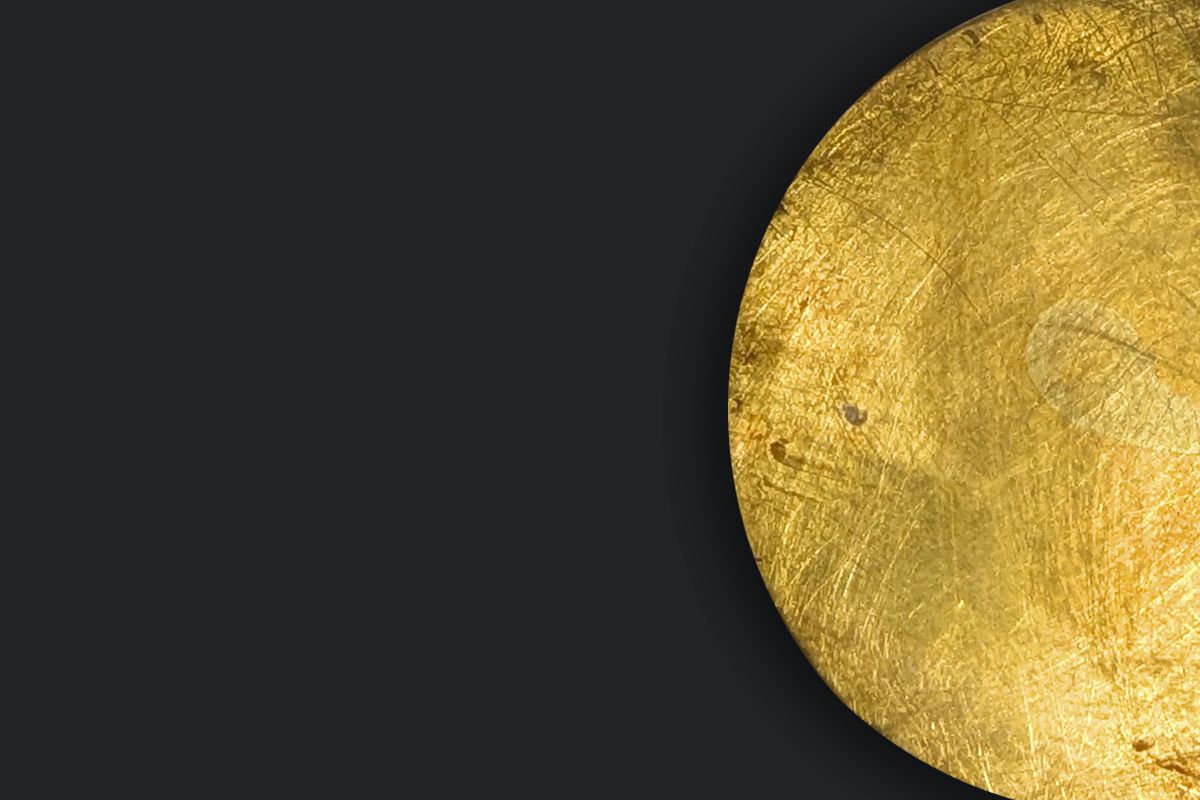
The concept that I was trying to illustrate was “CREATIVE CHAOS”. I did a ton of sketches but settled on ‘volcanic’ as the core conceit.
prototyping
Of the dozen or so concepts that I sketched out, I decided that the cooling magma pool would be the best to explore cold connections and sawing with. Looking at it now, the volcano eruption still has potential for a much more beautiful piece (but less skill-building)!
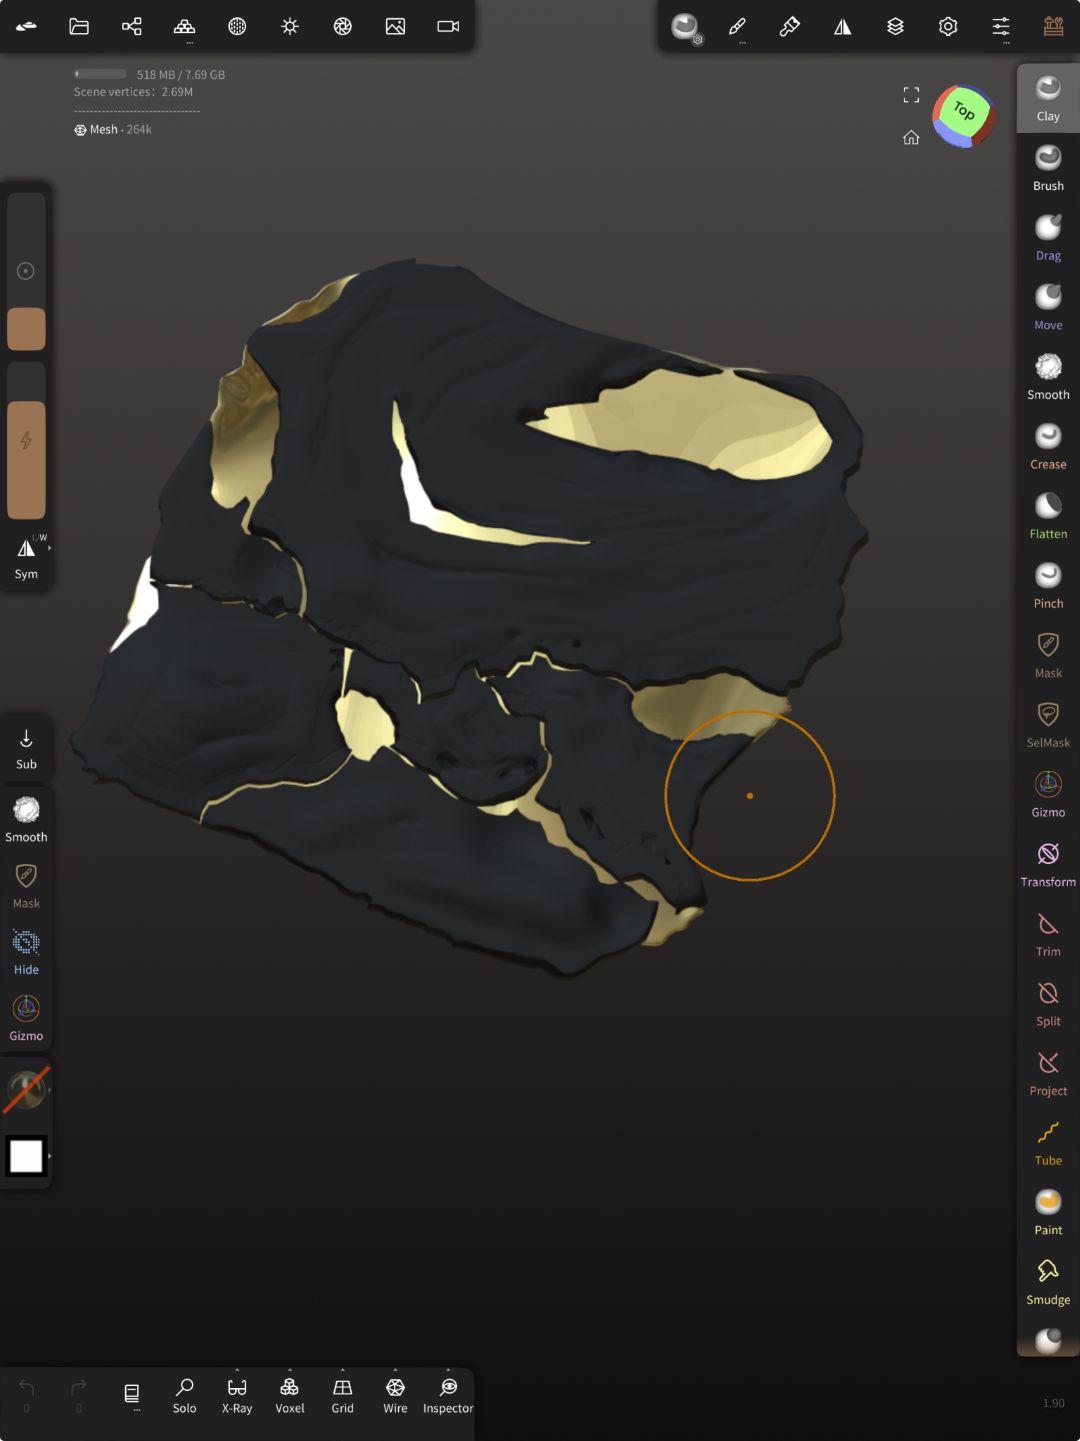
I wanted to go deeper than the 2D sketch offered, so I jumped into 3d! Of course, this could have been a clay or paper model but digital is just too compelling!
One of my favorite tools for quick 3D explorations is Nomad Sculpt — expressive and quick explorations. This model is fairly close to the final piece that I constructed!
design
The brooch gained popularity during the Victorian age. This was a time marked by rigid social customs. The rules and regulations for wearing a brooch were that the hinge should be on the right and the catch on the right.
Since the piece is fairly abstract, it can be worn a variety of ways. This presented a design problem:
How can an abstract brooch conform to traditional orientation constraints while allowing the wearer to express their own preferences?
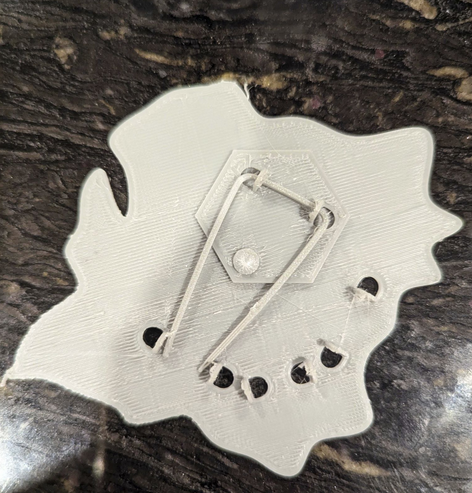
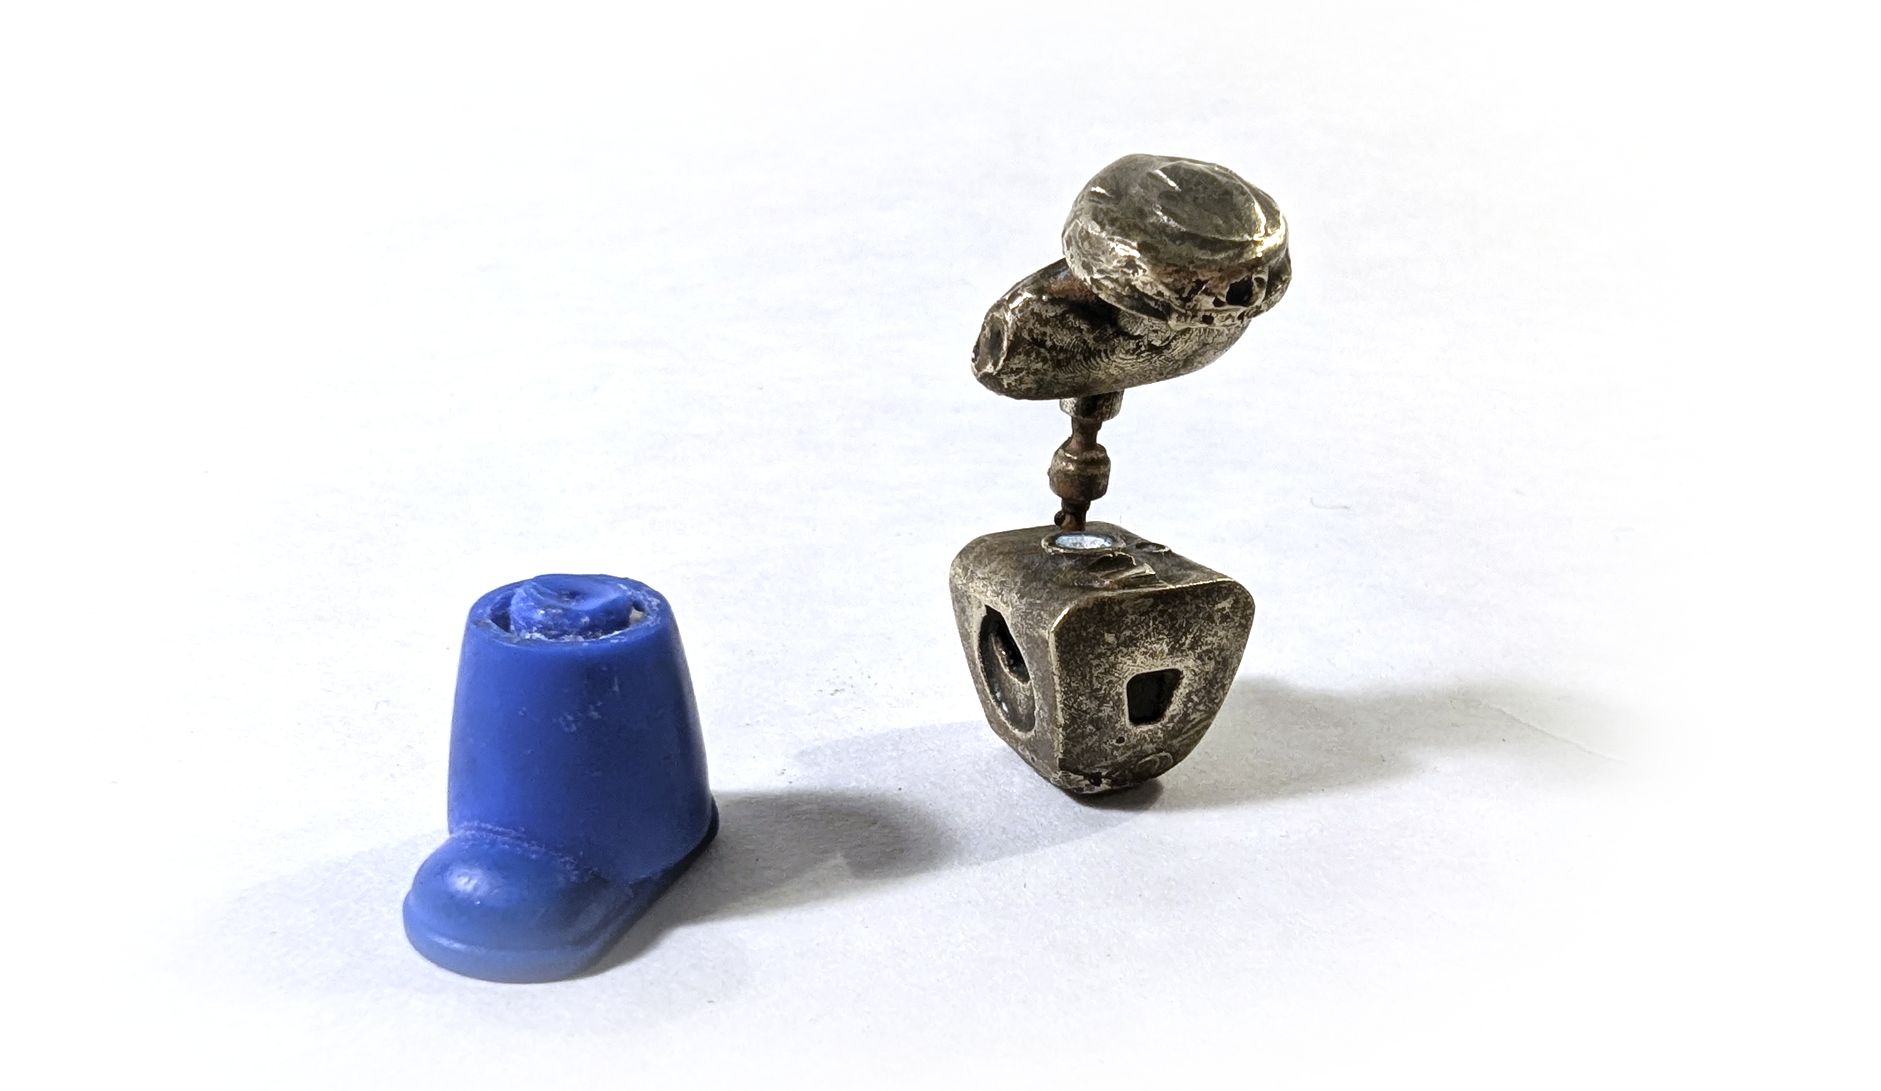
I used Rhino3D to design a pivotable (sic) hinge (pictured on left). Now, the wearer could still be a proper Victorian while wearing the brooch in a variety of orientations (landscape to portrait).
This was a fairly complex mechanism. My metal skills were very rudimentary (first project) so I turned to 3D printing to rapid prototype hinge/clasp placement and pin types.
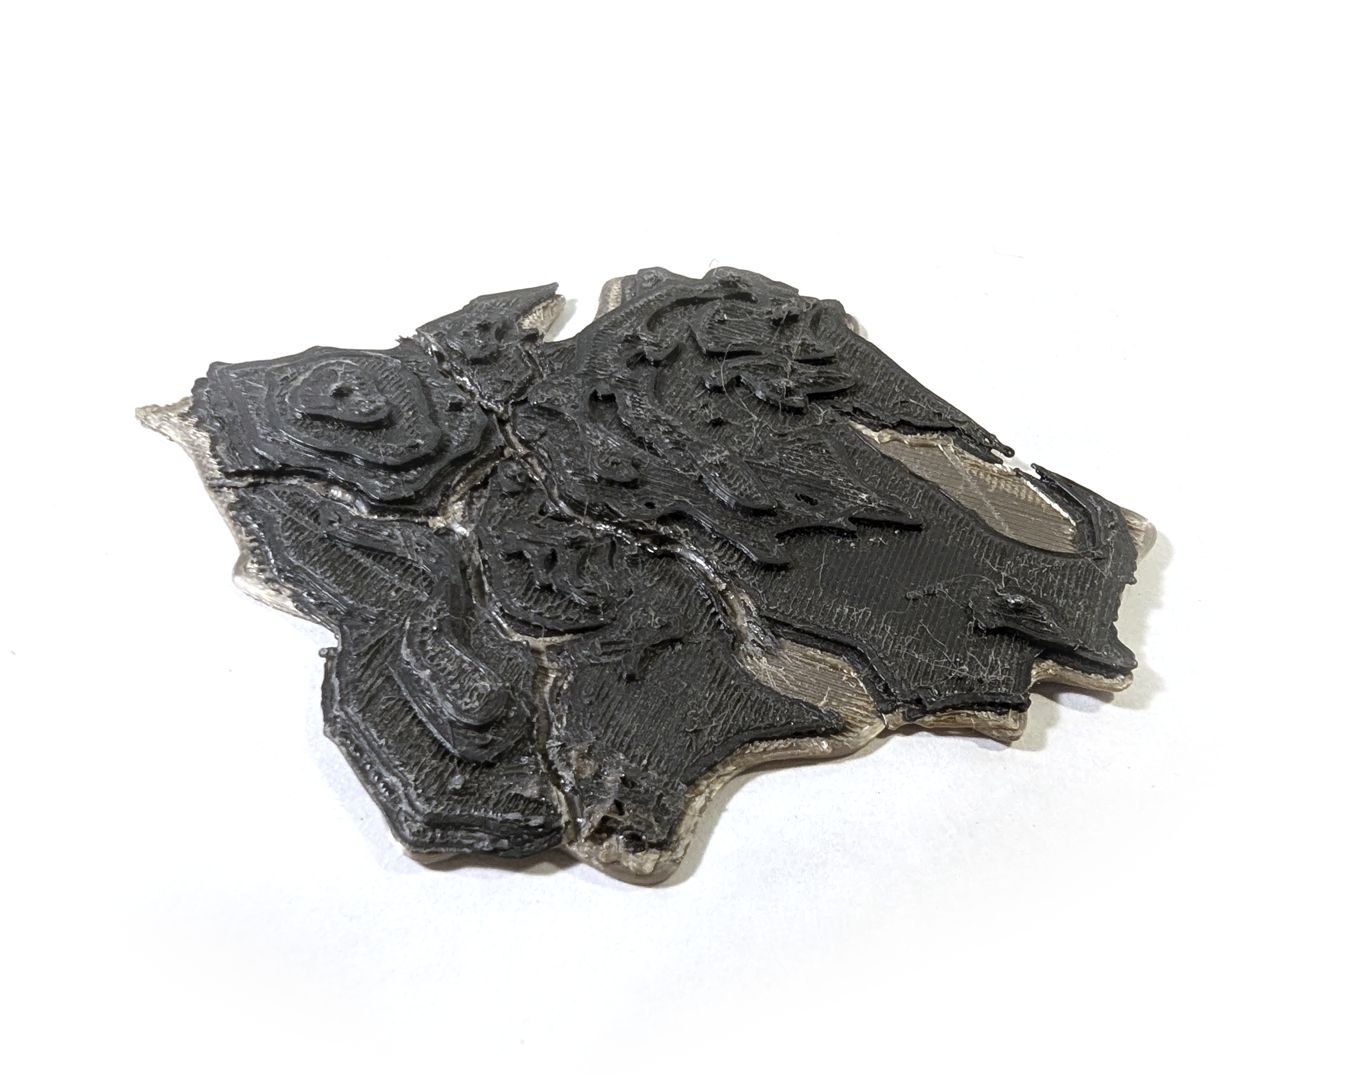
3D printing also came in handy to evaluate the overall aesthetic of the piece as well (pictured on right). I sliced up my Nomad Sculpt 3D model and printed the black (liver of sulfer) copper over the gold (brass) backing.
production
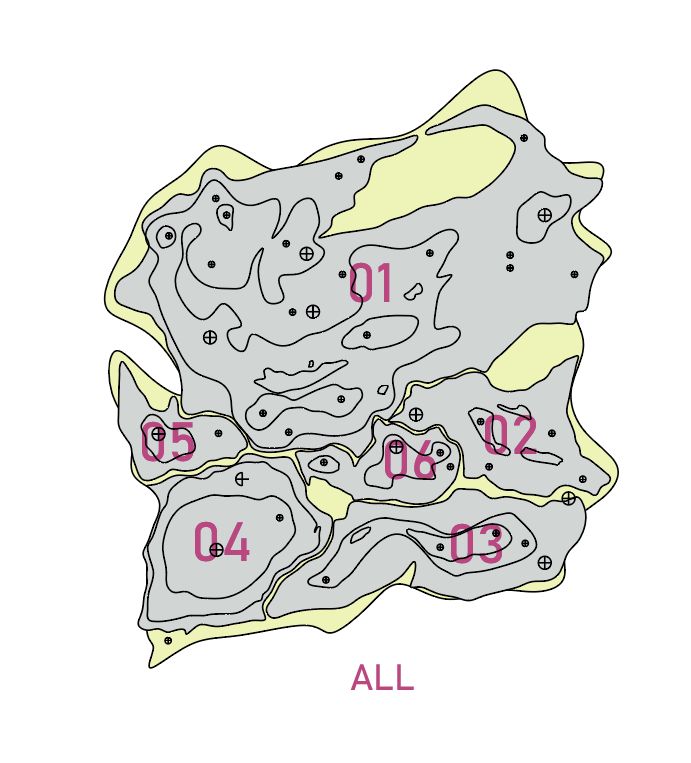

Once I was satisfied with the design, production began. This was another opportunity to use digital tools to streamline my process and ensure adherence to intent. Since I had the 3D model in Rhino, I was able to extract vector silhouettes of each layer of ‘magma’. This resulted in approximately a dozen different pieces that would form the base and contours of the black slag.
Once I had the shapes defined in Illustrator, I printed them out (with a numbering system to keep track) and rubber-cement’d them onto sheets of copper and brass. With these templates it was easy to cut out each shape to the design specification.
Figure
Prompt:
Make an object that has “skin” and “skeleton” using sheetmetal, wire and soldered connections
PRODUCTION DESIGN
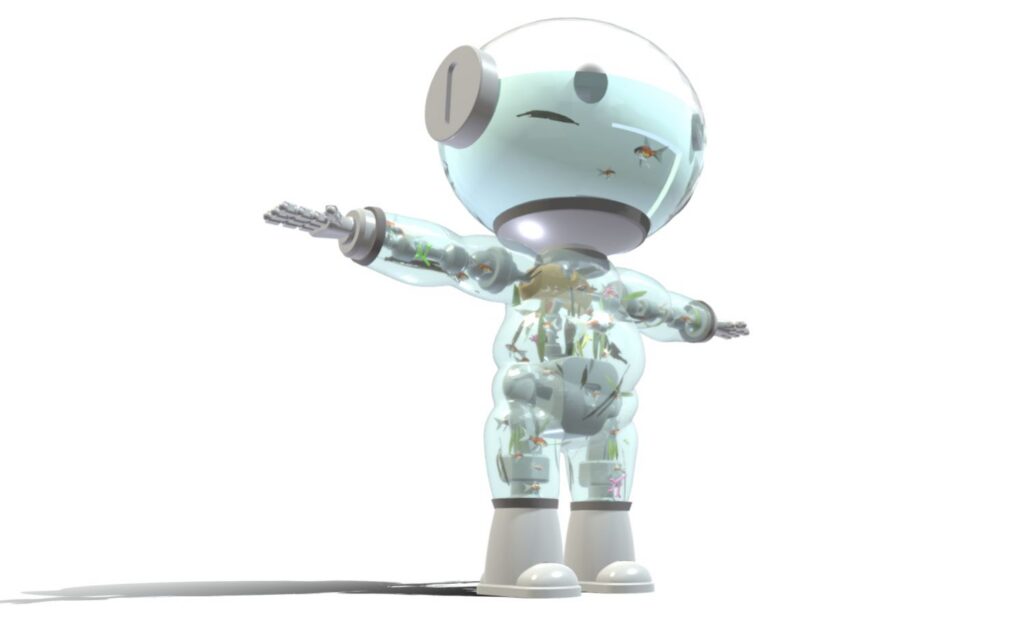
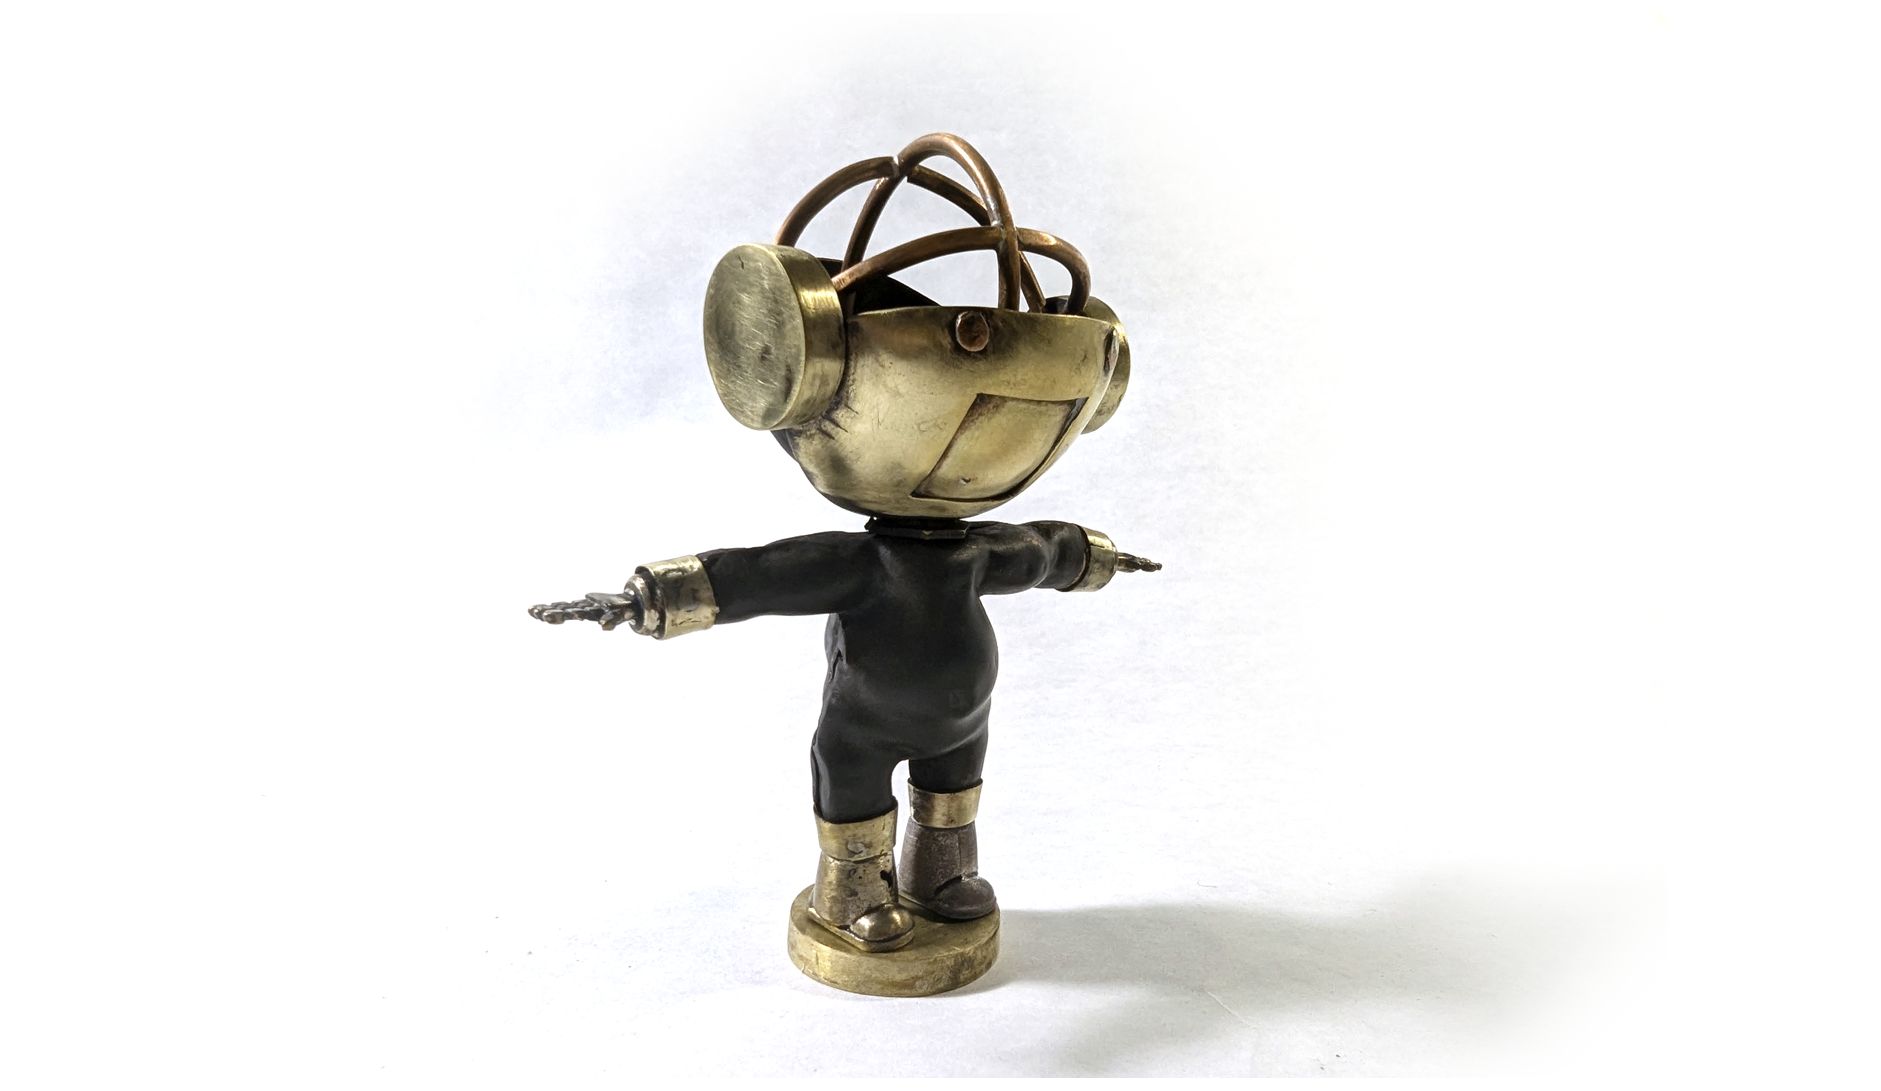
At the same time that I was enrolled in the basic metal class, I was taking an advanced 3D design class. I had just completed a character design of a robot that is also an aquarium (note the goldfish in his head). Aligning with my philosophy of digital + traditional, I used this model as the foundation for the skin/skeleton project.
Check out the model here.
Since I was taking this class for Grad credit, I wanted to push the concept/build further than the assignment. I envisioned that the ‘skeleton’ would be cast bronze that sat inside of a copper “skin”. The copper “skin” would be drilled out in a voronoi pattern to reveal the skeleton within.
prototyping
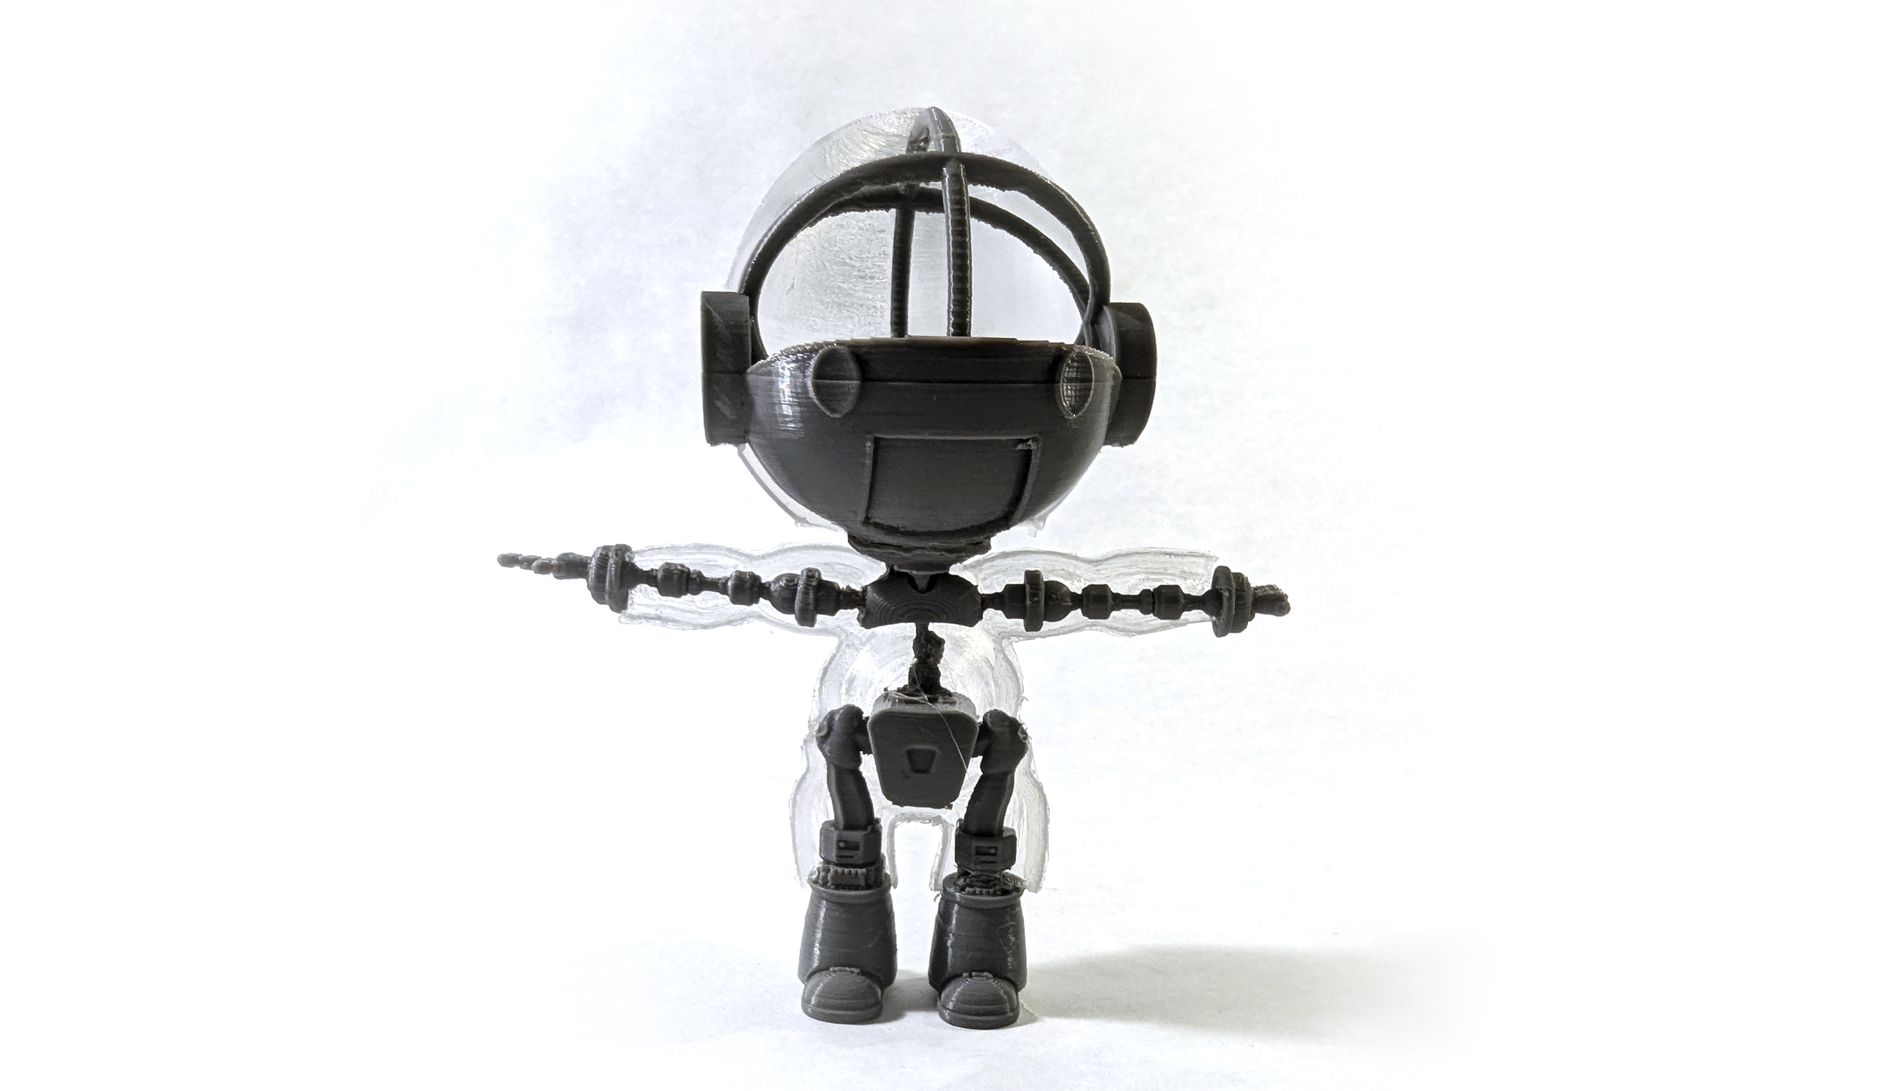
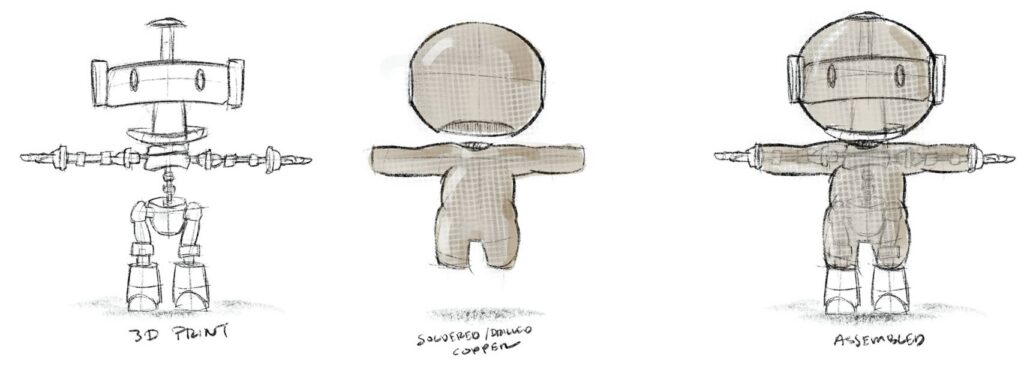
Since I had the 3D model of the aquarium bot, I figured I would upsize it for the Steambot version and make a few design adjustments. The biggest difference is the intersecting rings that make up the cranium (skin and skeleton).
Pictured is a full scale 1:1 prototype. Like the brooch, this was useful for visualizing the final piece and thinking about production challenges.
PRODUCTION – Casting
The bronze casting used 3D printed resin models from the prototype 3D model. Sadly, the inner skeleton did not make it into the final piece due to challenges with perforating the copper skin.
production – die forming


When making rings with copper/brass, it is necessary to have a ring stretcher to ensure the roundness of the ring. I did not have extensive metalworking capabilities in my home studio so I used 3D design and printing to make various jigs and stretchers for the bits of steambot.
production – DAP
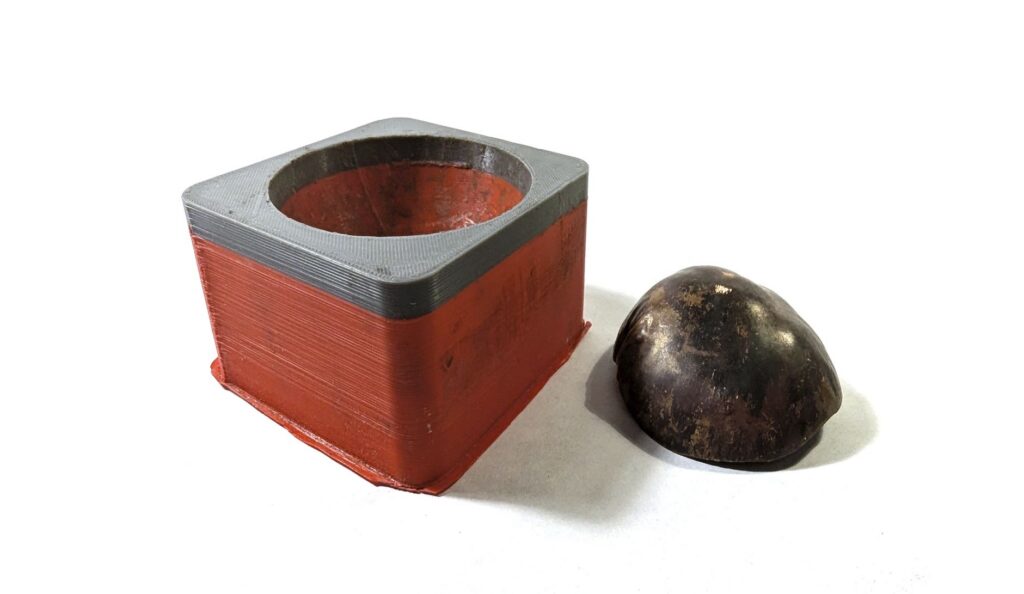
There wasn’t a large enough Dap for the head of the bot in the Basic Metal studio so I made my own! To the right is the lower half of steambots cranium.
production – DIE FORMS
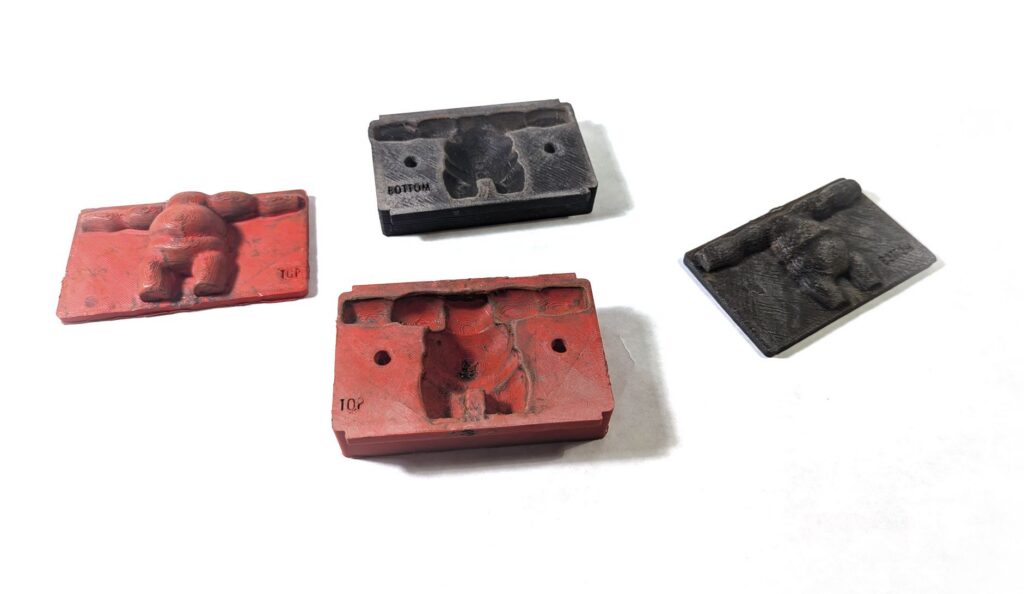
Complex organic body shape would have been far beyond my skill level to freeform. Instead, I 3D printed PLA die forms and pressed out the two halves of the body (each were unique) and soldered them together.
production – 3D printing

During the investing process, one of the legs ‘floated’ off the sprew. Since time was short, I 3D printed a replacement and did some moderate post-processing. Can you tell which one?
mask
Prompt:
Using any techniques we’ve learned during the semester, create a piece that is a line on the body
conceptualization
While I explored a variety of ideas, I settled on one that would become a hot topic: defeating facial recognition systems!
Concept:
Create facial jewelry that could be used to defeat facial recognition software.
DESIGN
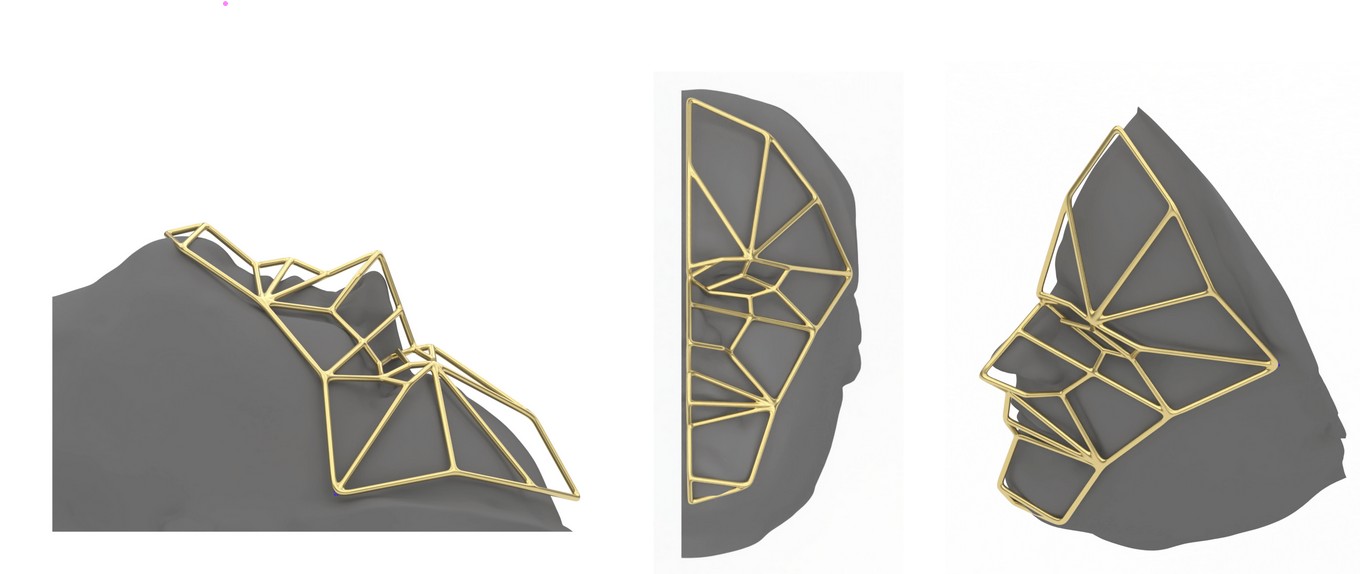
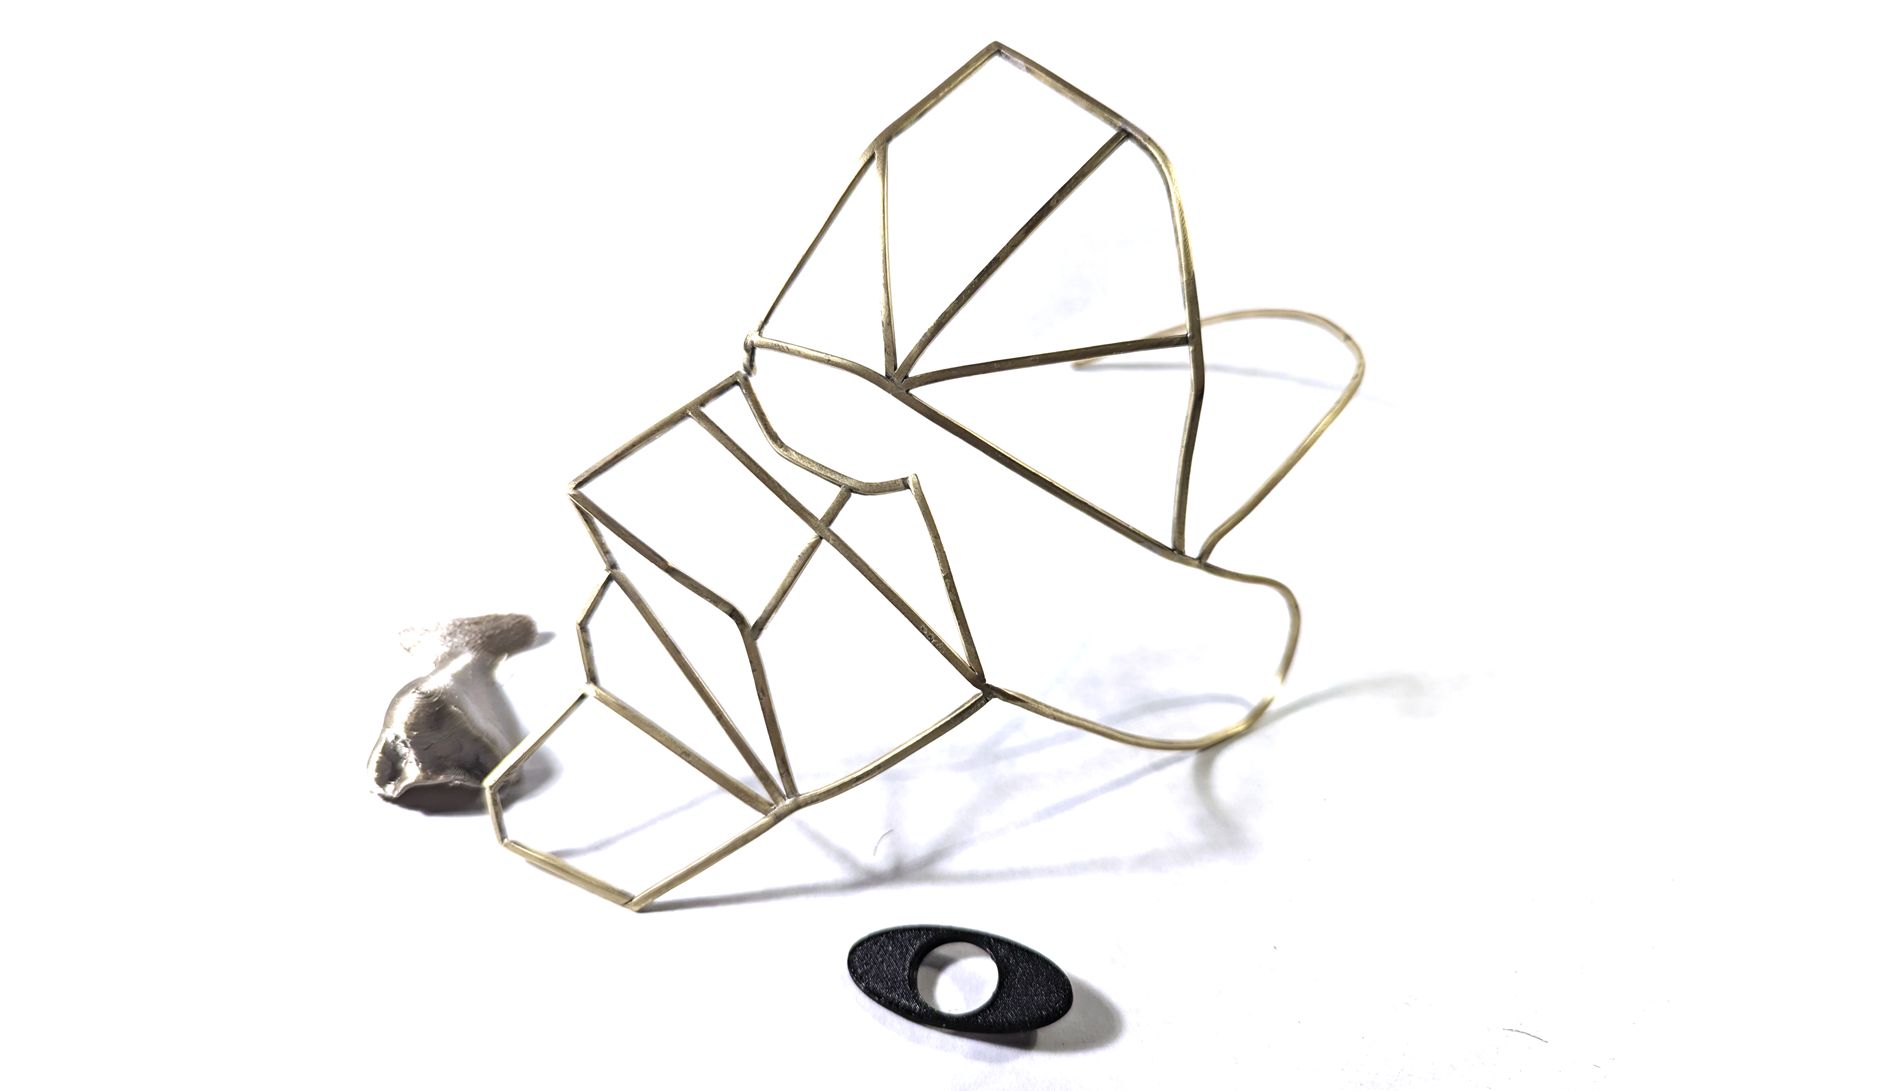
I wanted the finished piece to feel like jewelry — not a mask. Facial recognition systems use various points on the face (and distances between them) to identify individuals. This is often depicted as a wireframe.
This made the design direction pretty obvious. The shape of the wireframe obscures the major facial recognition points of the jewelry wearer.
PROTOTYPE
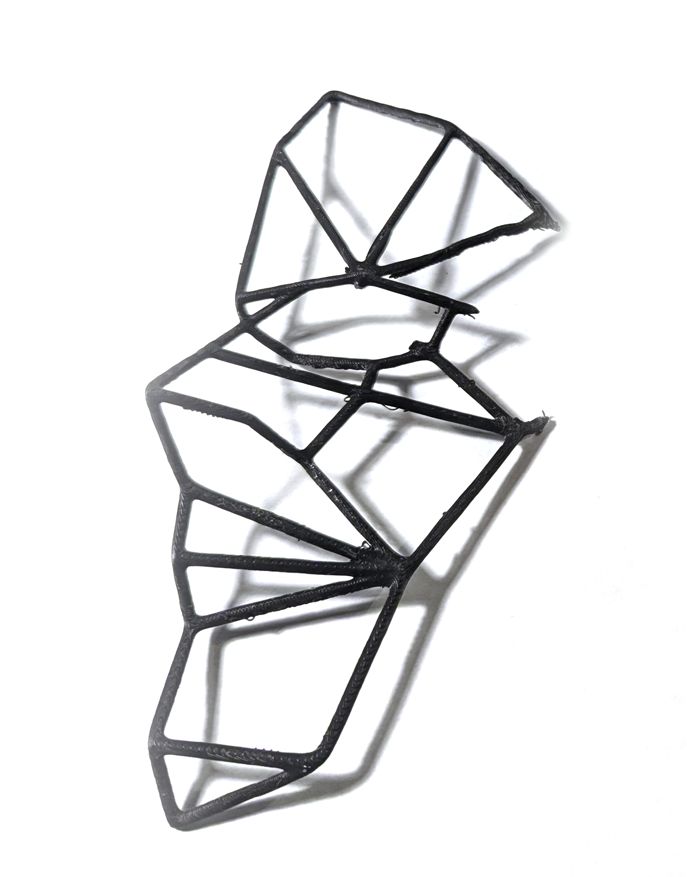
I did not want to solder the mask together on my actual face so I made a 3D print of the mask for proper fitment prior to production.
production
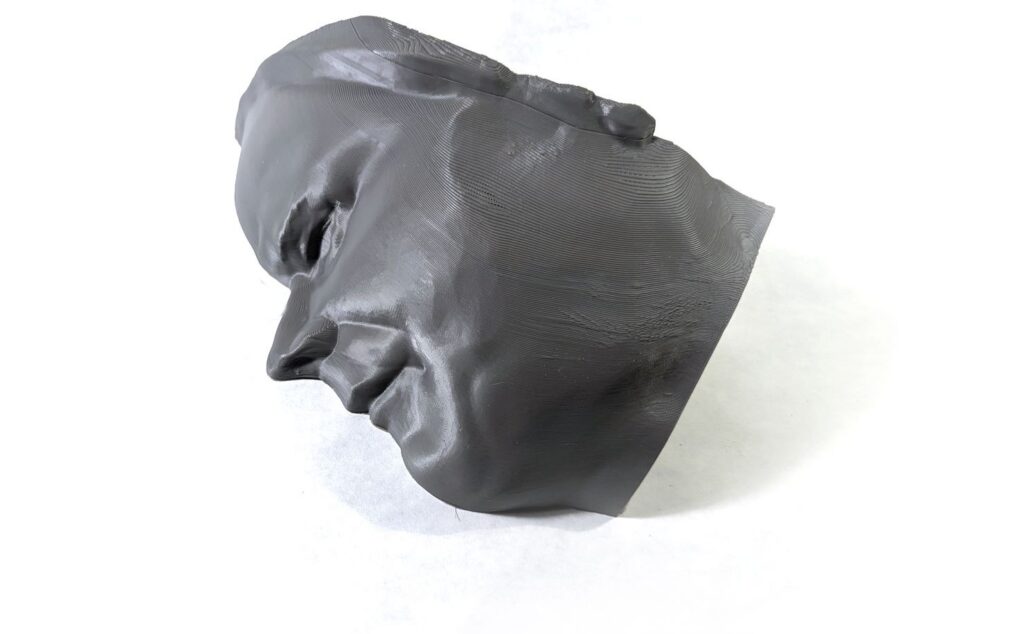
3D Printed scan of my head and used it for fitment/buck/form while building the mask.

In order to keep up with evolving state-of-the-art for facial recognition, I used a modular approach to attaching ‘distractions’ to the face frame via snap-on clasps. Pictured is a 3d printed nose (from the internet) and a stylized eyeball.